


Features
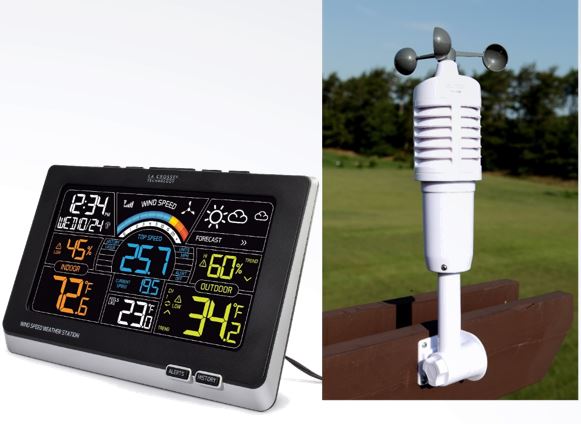
- 3-in-1 wireless sensor for outdoor temperature, humidity, and wind speed
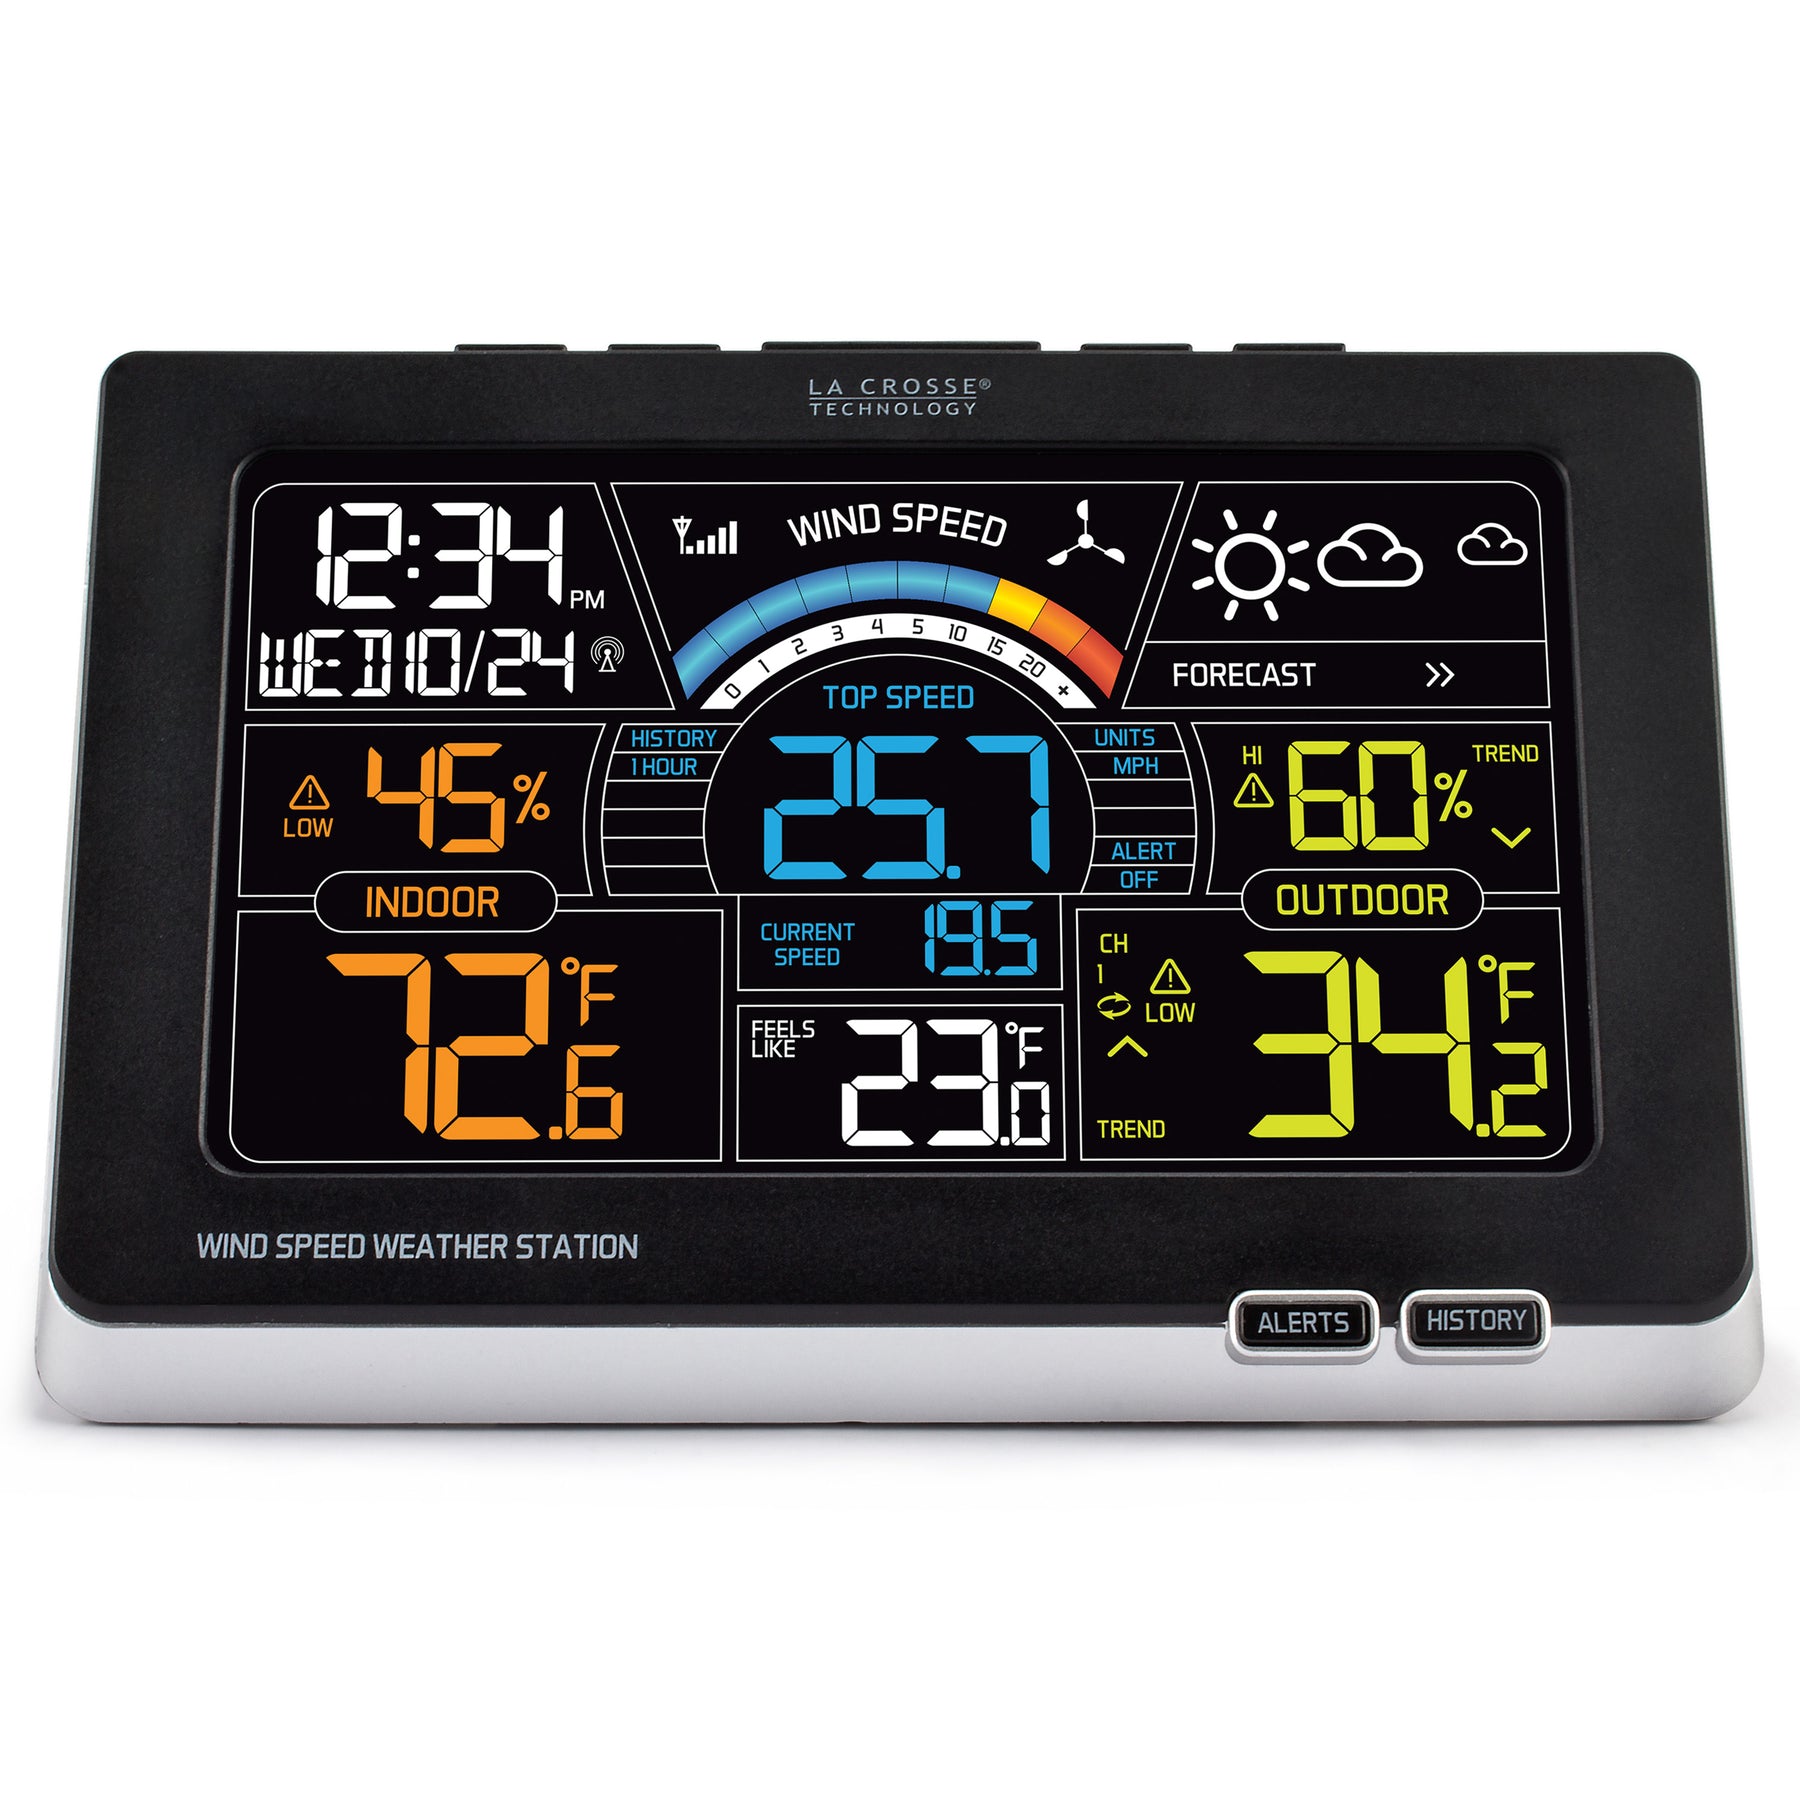
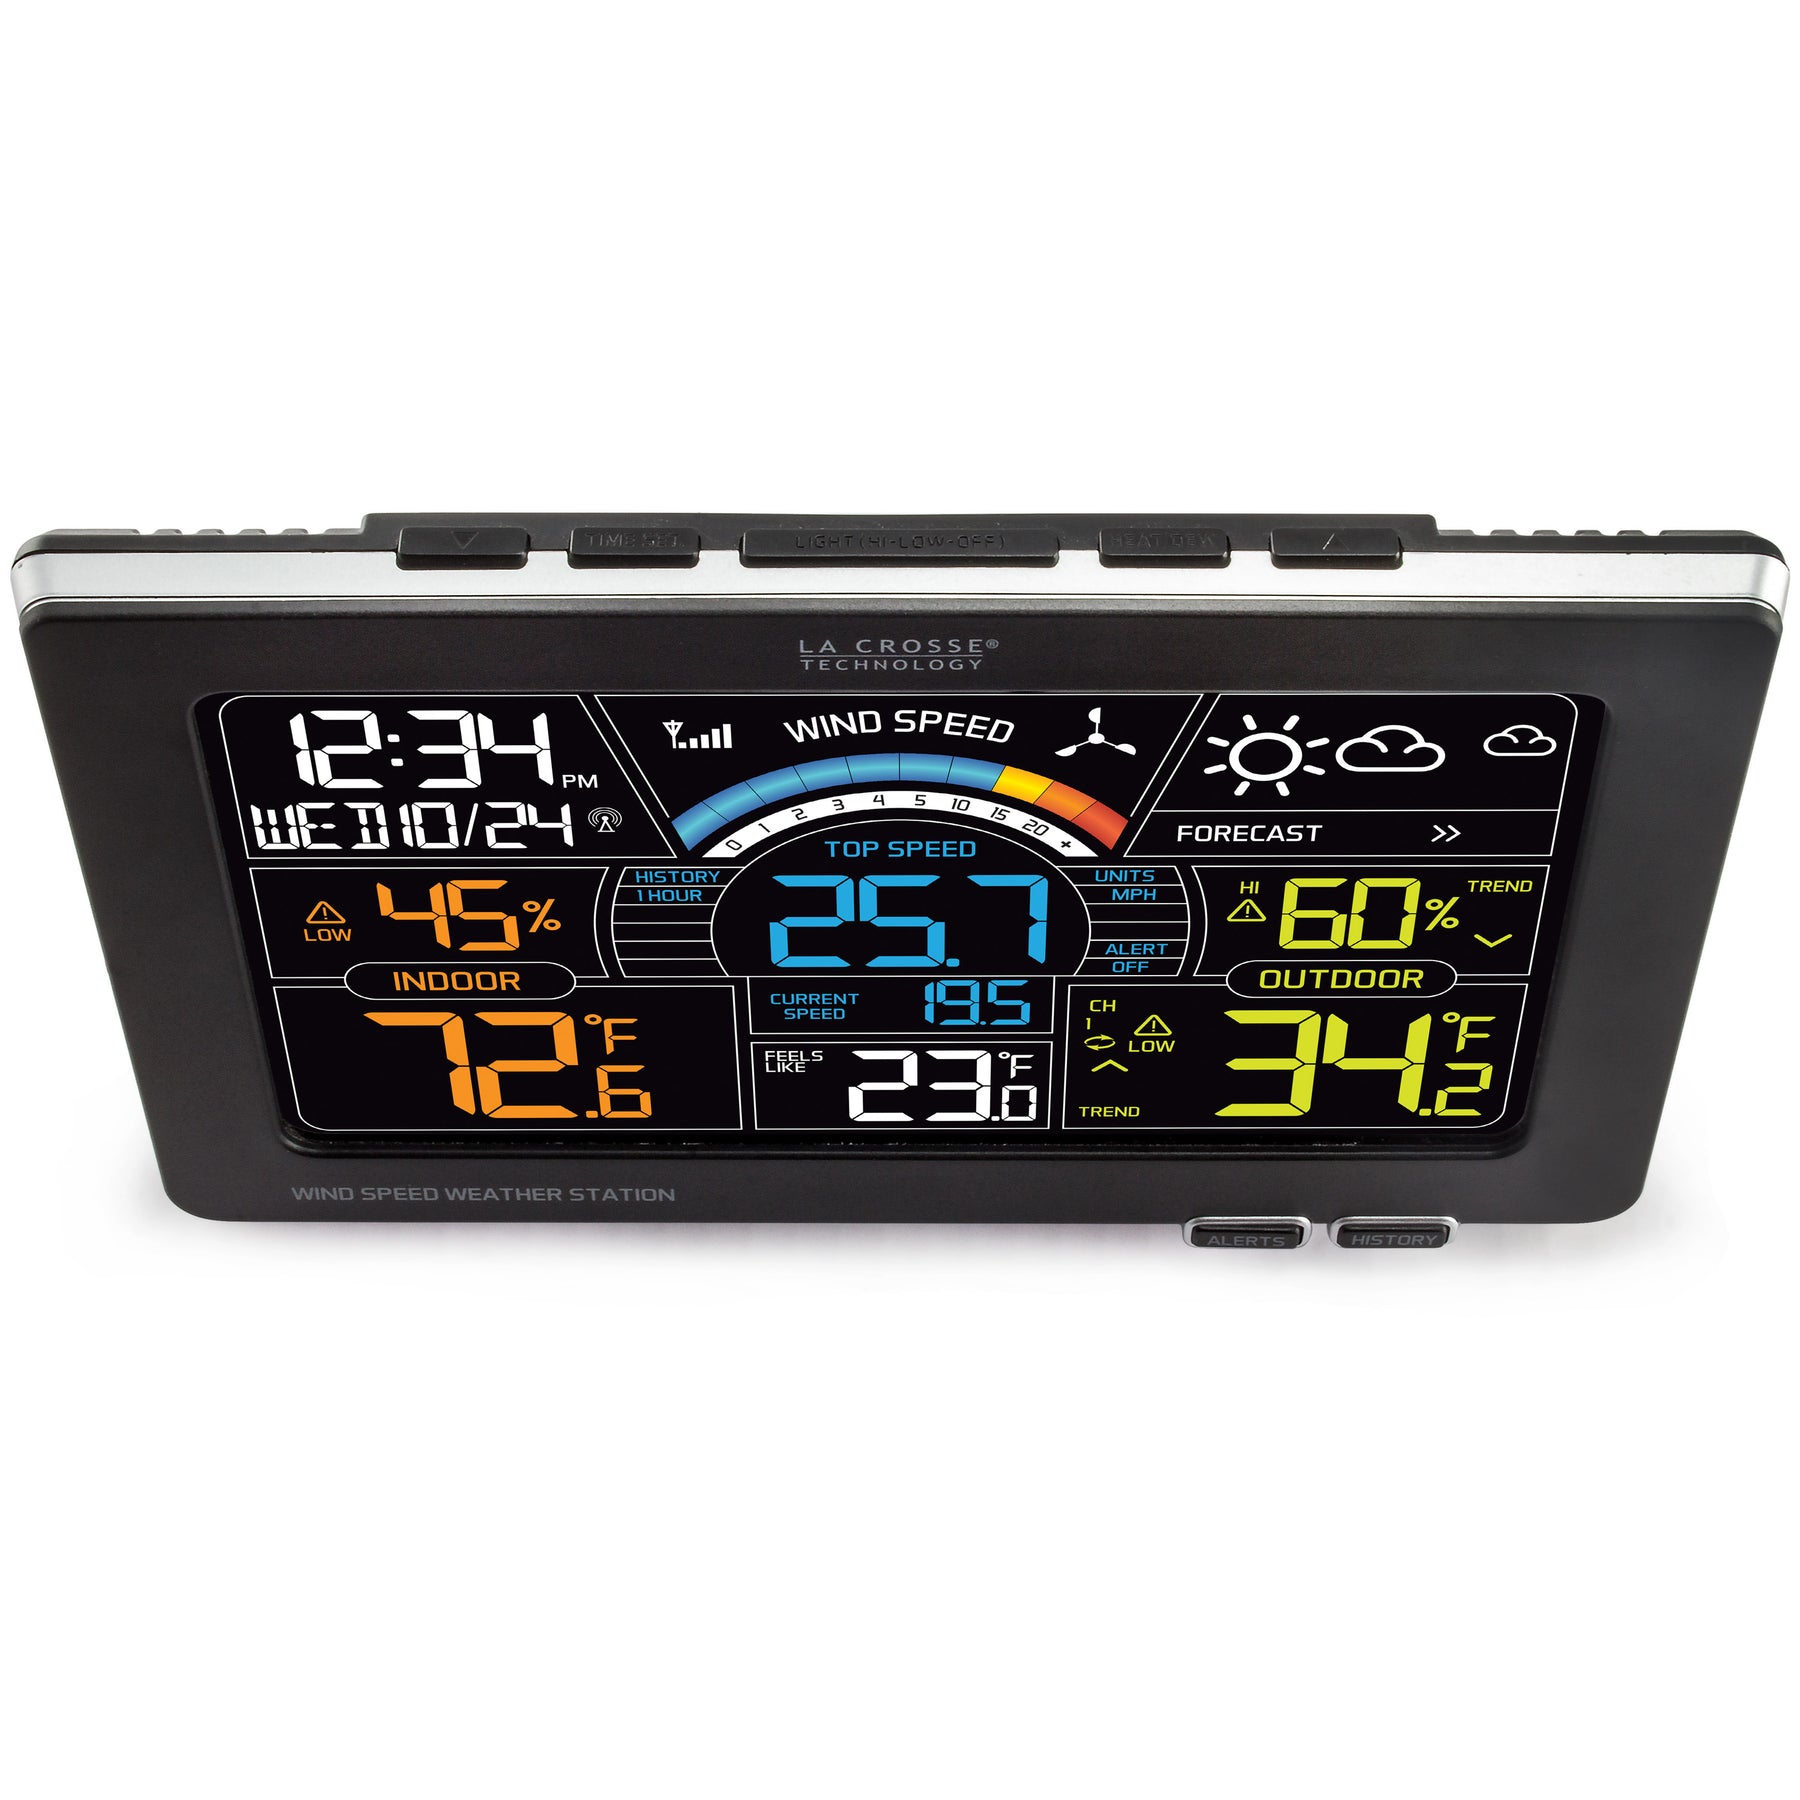
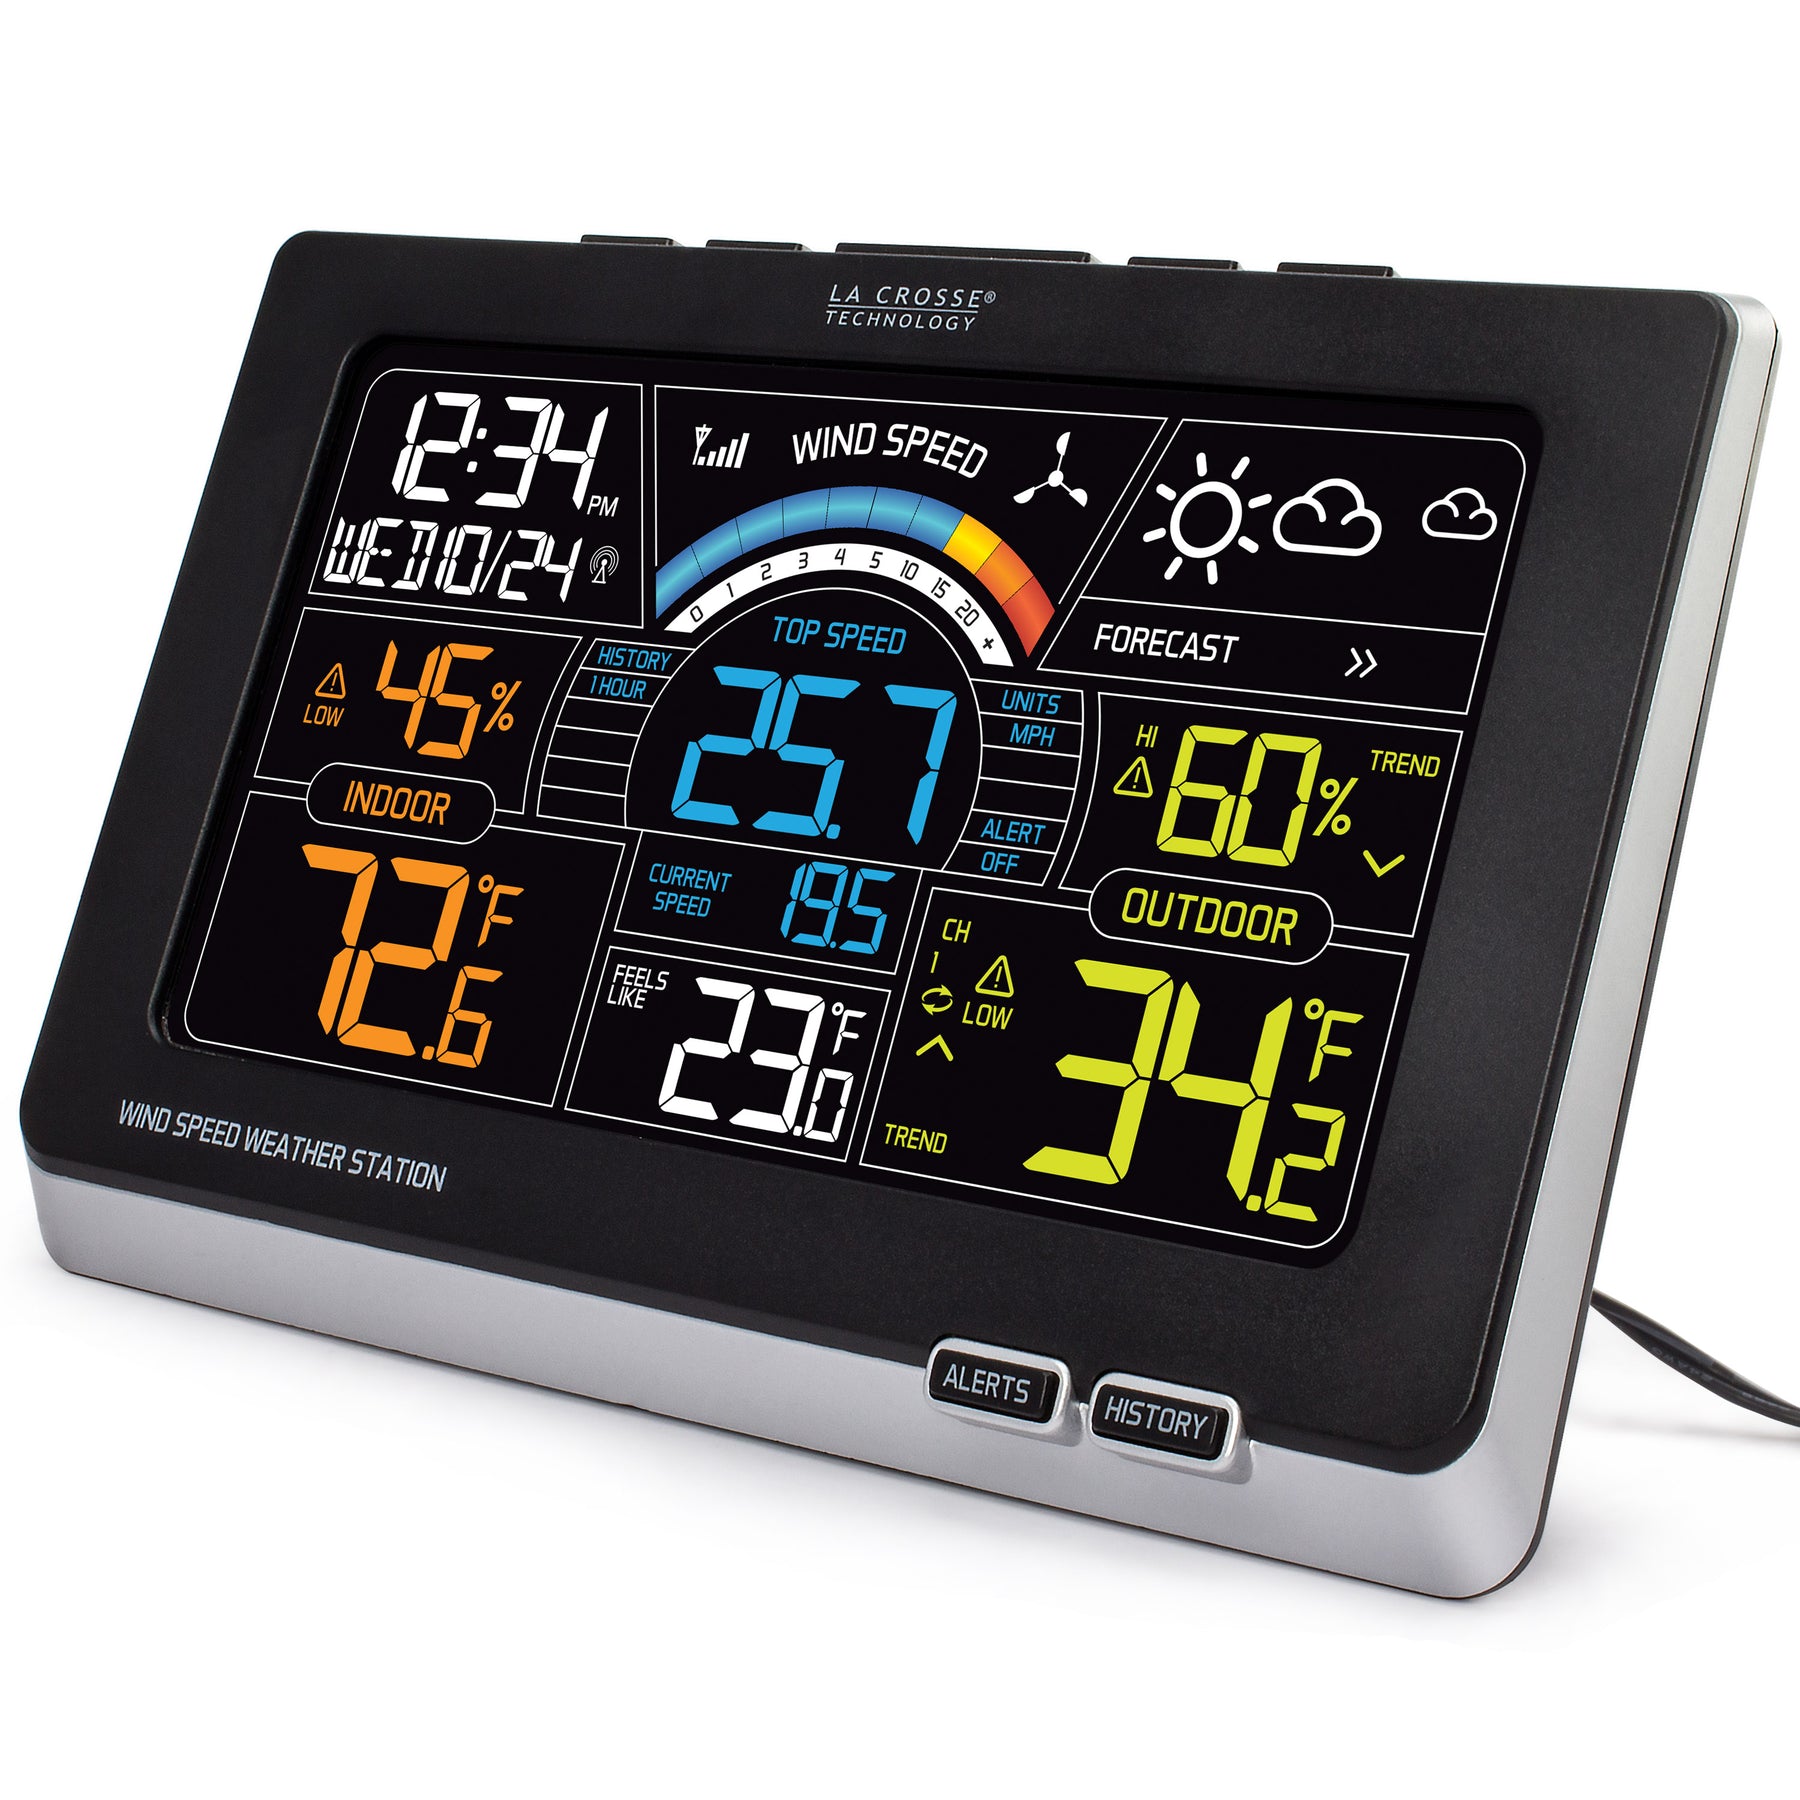
- Wind speed graph (current speed)
- Current wind speed (mph/kmh)
- Wind speed history (1hour, 24 hours, 7 days, month & year)
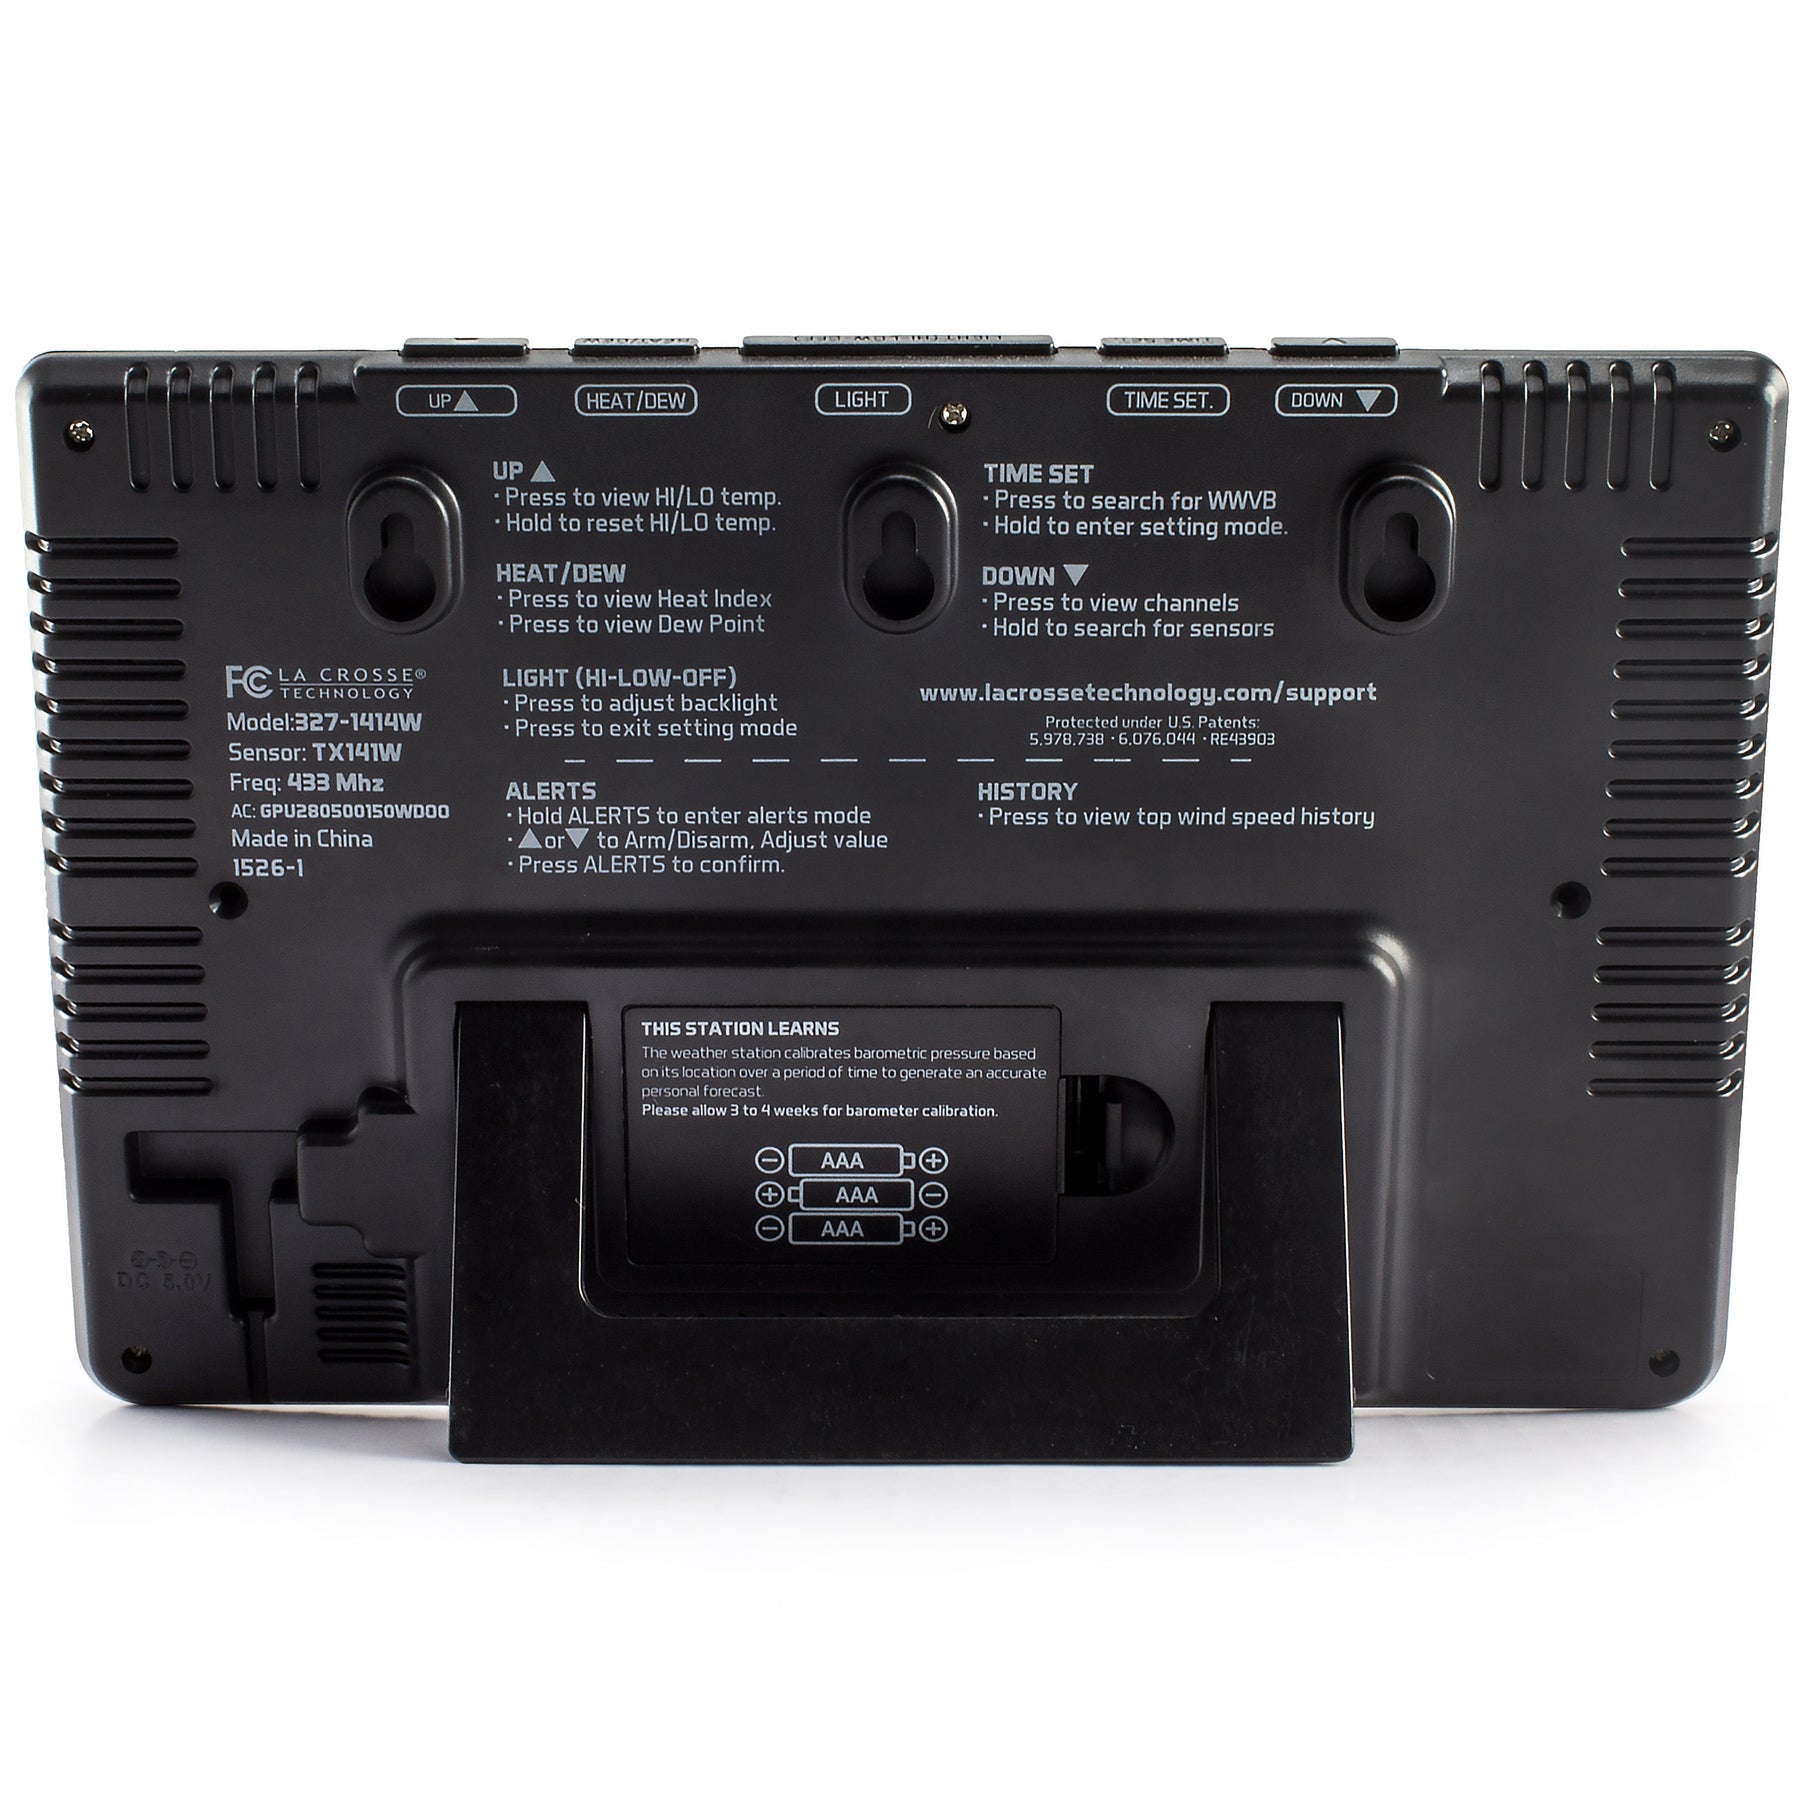
- Top wind speed and history
- Wind speed alerts (HI/Off)
- Indoor/Outdoor temperature (°F/°C)
- Indoor/Outdoor humidity (%RH)
- Temperature/humidity trend indicators
- MIN/MAX Indoor/Outdoor temperature records
- Indoor/Outdoor temperature alerts (HI/LOW/OFF)
- Dynamic color forecast display
- Forecast tendency indicators
- "Feels Like" Temperature (Heat index and dew point)
- 12/24 hour atomic time (manual set option)
- Automatically updates for Daylight Saving Time
- Calendar (month/date/year)
- Adjustable backlight (HI/LOW/OFF)
- Signal strength indicator
- Low battery indicators
- Wall hang or table standing
- Supports up to 2 additional temperature/humidity sensors (not included)
Specs
Specifications:
Display
- Indoor Temperature Range: 32°F to 122°F (0°C to 50°C)
- Indoor Humidity Range: 13% to 99% (%RH)
Included TX141W 3-in-1 Wireless Outdoor Sensor
- Outdoor Temperature Range: -40°F to 140°F (-40°C to 60°C)
- Outdoor Humidity Range: 13% to 99% (%RH)
- Wind Speed Range: 0-99 mph (0-159 kmh)
- Transmission Range: Over 300 Feet
Power Requirements:
- Display: Level V AC adapter for primary power (included); 3 "AAA" Alkaline batteries for backup (not included)
- 3-in-1 Sensor: 2 "C" Alkaline batteries (not included)
Dimensions:
- Display: 8.34" L x 1.03" W x 5.48" H
- 3-in-1 Sensor: 3.5" L x 6.25" W x 12" H
- For custom mounting of 3-in-1 Sensor use 1” Electric Metallic Tube (EMT) Conduit
Parts/Sensors


Register/Warranty
La Crosse Technology, Ltd. provides, to the original purchaser, a 1-year limited time warranty on this product, relating to manufacturing defects in materials & workmanship. In accordance with the Song-Beverly Act, in the state of California, the warranty on this item becomes effective on the date of delivery. The item will be either repaired or replaced at La Crosse Technology's discretion.
Click Here for full warranty details
Use the registration form below to register ownership of your product only. If you have a question about use of the unit, please click on the support tab next to this one to see available support material or submit a ticket.